Architectural & Interior Design Photography, Corporate Commercial Photography, Advertising & Portrait Photographer | Ottawa | 613-558-7585 | justin.vanleeuwen@gmail.com

I was on twitter a few days ago, and caught a tweet by someone that asked why a photographer hadn’t shot the twitter egg (the default avatar for new users) as a real egg? And seeing this as an opportunity to actually produce this I said he was right – and I would.
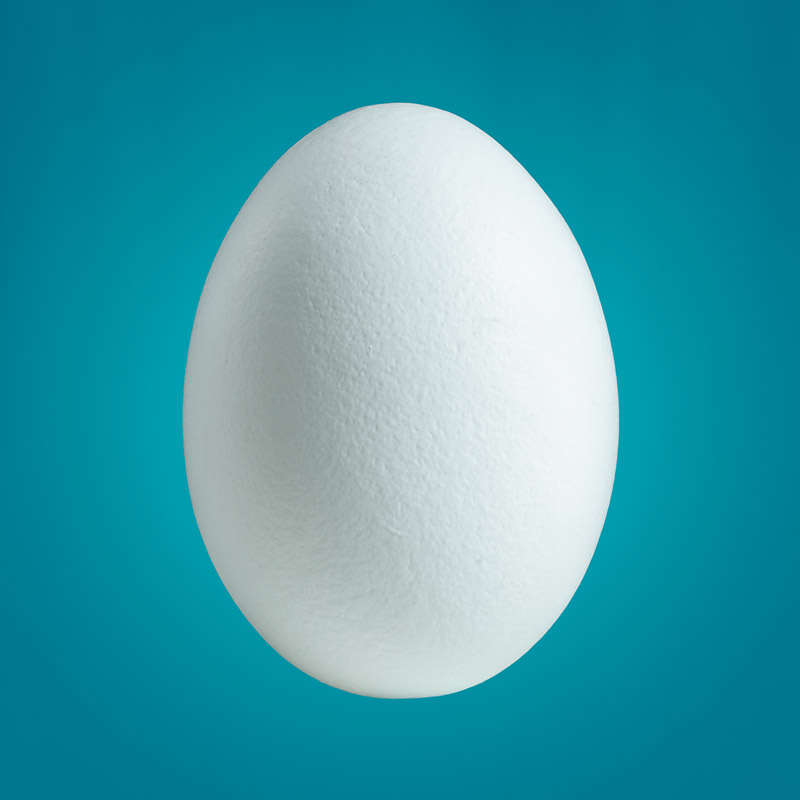
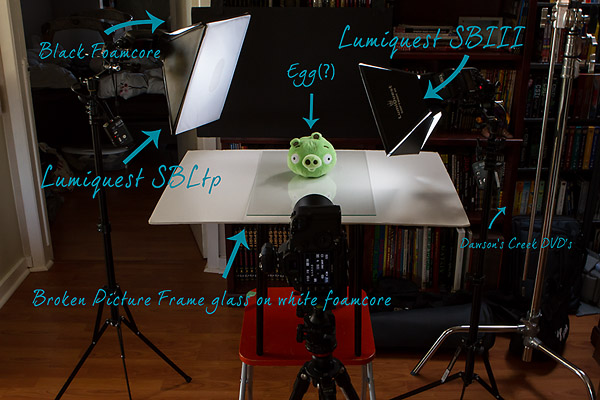
Simple objects sometimes need simple lighting, but it also needs to be carefully applied, too much light,and the egg blows out losing all detail, too little, and it won’t be “white” and the shadow will be dark. I also chose to use two very small, but handy, modifiers, the Lumiquest Softbox Ltp & SBIII which would help control the spill of light and contain it just to my subject. To give the egg dimension and texture I positioned the main light to the right of the egg and slightly in front; so that there would be a transition to shadow. I then added the second light behind, and at a lower power output to give the egg some separation from the black background (which would make it easy to mask out in Photoshop).
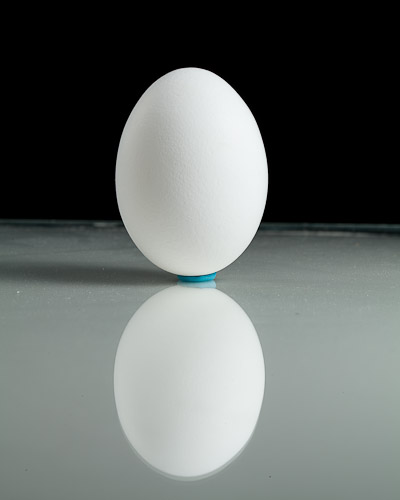
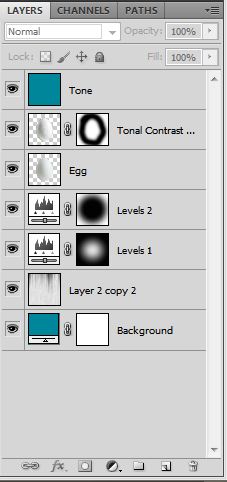
The egg was held up with some poster tack, & I have it on a sheet of glass over white to help bounce light back from below to give it a “floating” look when it cut out. Photoshop was easy enough, Mask, layer, background fill layer, using a sampled colour. The fill layer allows you to easily change the colour later when you want like this. I added some textures to the background,faintly, so it wouldn’t be a flat lifeless colour, I also added a low opacity layer of the background colour over-top of the egg to help the colours seem more natural.
This probably didn’t take more than 30 minutes and it was kind of fun to do. I highly recommend the Lumiquest soft boxes as they fold down completely flat so are super portable – Great for tight head-shots of people too. It would be pretty easy to replicate this setup, and you can choose any colour you want for the background – if you end up trying it out link to it in the comments, I’d love to see your attempt. Setup photo below:
so good! the light and everything! nice work! but next time make the background RED!
Thanks for describing the pre and post process. A lot of times photogs will expound on the pre aspect, but not on magic they do back in the lab. It is nice you gave us an alpha-to-omega, or egg-to-chicken description. 🙂
Very nice and interesting.
But this is NOT an egg, but an egg photography (my little tribute to Magritte)