- Hide menu

Blog

Lapsed

Lapsed

Fortune favours the prepared.

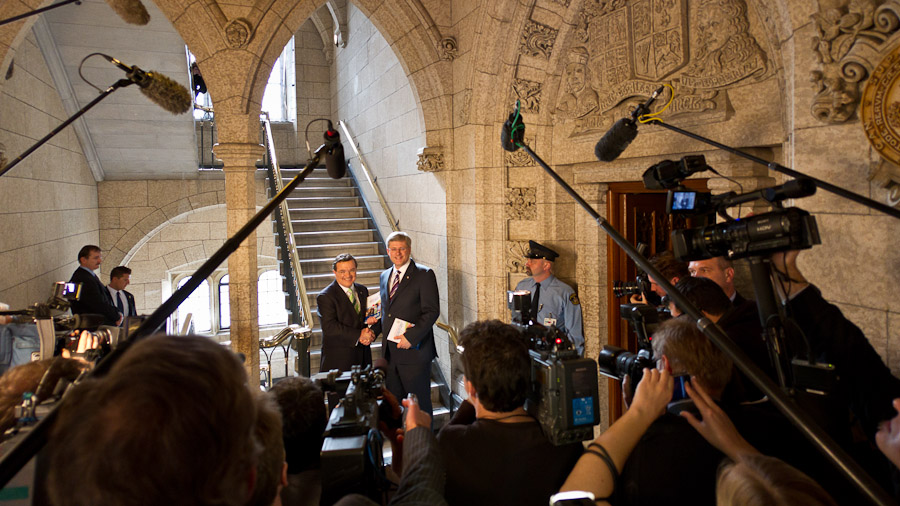
I was asked to complete a special project for iPolitics.ca last week, budget day, a bit out of what you normally see me display on the blog. While I was there taking pictures, the quantity asked of me far exceeded any shoot I had previously undertaken. I was to document the busiest day of politics on Parliament hill, and, likely, the fall of the Harper Government, all on timelapse.

Now this wasn’t a camera in the house of commons, no, this was going to be the Media area, busier than it is at any other time of year. I shot the timelapse as wide as I could, and when some space opened to me, I popped on the fisheye lens and captured it even wider.

Time lapses are, fundamentally, quite easy. You set up your camera, have it take a photo at certain intervals, compile them together and *pop* out comes a video. The planning and implementation is where you really need to focus. How long the final video is to be will determine how many frames you capture at what interval, or even how smooth you want the action to appear. You also have to worry about running out of memory, or battery power while on the shoot (the above video was captured from 1:50pm to about 9pm that same day). If you’re a Nikon shooter you can do this all in camera, or if you’re a poor sap like me, shooting Canon, you’ll need an accessory like the TC80N3 Timer Remote
, or one of these awesome little devices from Pclix. If planning on timelapses only, the Pclix was a lifesaver – super easy to use, Canadian made, and programmable with some very interesting options.

I picked up a Canon 60D which proved to be quite an asset in this case. I had the camera mounted high over my head, but I was able to check on it, occasionally, due to the pivoting LCD. The battery itself was able to last about 8,000 actuations – 1/50th a second or so – on a single charge. Did I have a backup? Yes. But I didn’t need it. Very impressed with this little “prosumer” camera, the hype has put it down, but as a Canon shooter I think this guy’s worth a look, especially if you’re entering the market, or just upgrading from the entry level Rebel line.

Special thanks to Mediastyle for the hookup, iPolitics.ca for the access and work and Pclix & lensrentalscanada.com for having such great service, and overnight shipping.

If you have your own budget day stories leave a comment! Or if you want to see a few more photos from Budget Day – head on over to my Flickr page.

Anyone?

Anyone?

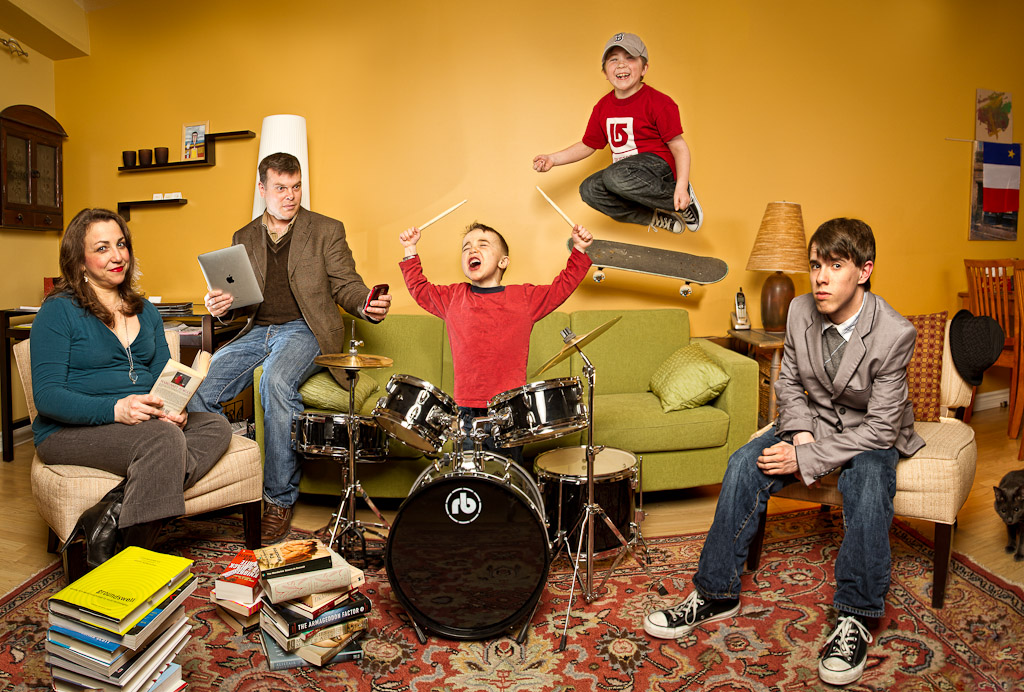
Another awesome family, another fun extreme portrait. The Buell’s (I’ll refrain from the Ferris jokes) contacted me about creating their own unique family portrait. Unlike Nadine, though, they didn’t have a clear vision of what they wanted – just that they wanted something different than your every-day family portrait. Well that’s what I do, isn’t it?

We didn’t have a lot of time, since Mark, the eldest son (at right)was visiting from the East coast for the week. I figured the best way to do something interesting, would be to overtly showcase everyone’s traits; their favourite things to do. Reading, reading with tech, drumming, skateboarding, and fashion. Pretty straight-forward I think?
I even sketched it out before I met anyone or saw their place:

My only assumption was that they had a couch. Didn’t know the size of the room, location, look, anything. So I come prepared for whatever we get. We did have to move a coffee table out of the way to give room for the camera, and I used a wider angle lens than I normally like to for composite images (17mm – it’s why you see some distortion in the image). In the end, though, I think the distortion kind of adds to the pic – the youngest son in the front, with the drums, gets a bit extra highlighting by being “pushed” forward and everyone else kind of falls into place.

The family seems pretty pleased with it, as they choose their own selection of frames for their final portrait (this one contains my selects). I think they should print it out big for over that couch!

If you’re interested in having your own family portrait taken, like this, get in touch – I warn you – only fun families need apply.

If you’re interested in seeing a larger version of this image, or lighting info, head over to Flickr.

Mediastyle

Mediastyle

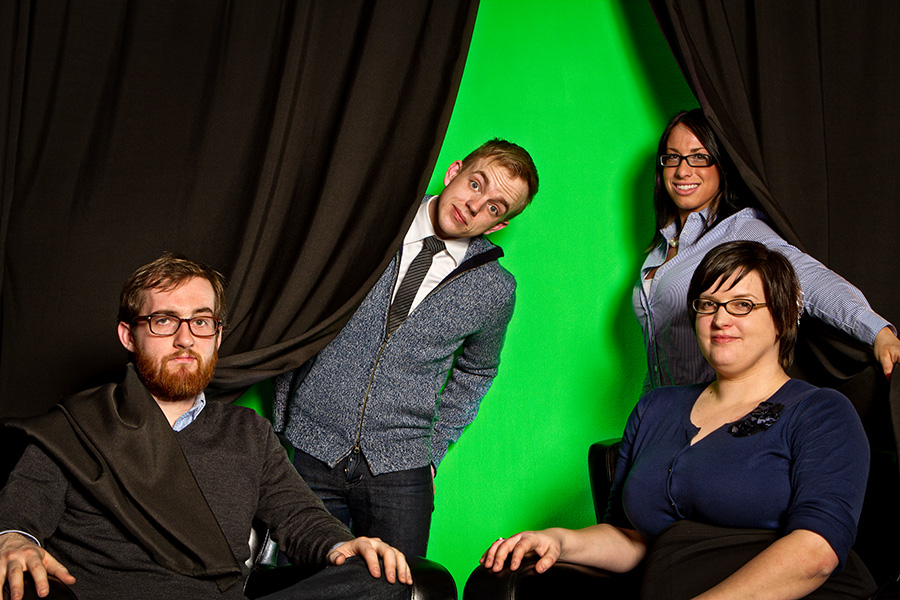
A few weeks ago I was called, last minute, to do a shoot for a new Ottawa-based media firm Mediastyle. Headed by the much lauded Ian Capstick, I jumped at the opportunity. Ian’s an Ottawa main-stay, and while I certainly cruised the same twitter circles as he, we had never met in person (IRL).

While I was contracted to shoot an office-party/event I knew the group was going to be small enough that we could definitely get some portraits done at the same time (usually my event coverage alone doesn’t include portraiture). Another plus, is that they have a media room that they’re equipped to shoot podcasts in. I wanted to use that space to show not just the people (and fun people they are!) but to give depth to instantly know what they do. I think the green screen is a dead-giveaway that they’re a group that “Do Video.” As well, I’m sure it can lend itself to photo-mashups with the green removed and “something” put in place. Go ahead, I dare ya!

If you want to read more about the team over at Mediastyle – check out their about page here. I’m also cross-posting this image to Flickr with lighting info.

Got You

Got You

The snow got us, the cold got us, whatever it’s been – everyone in my house has been sick. So I offer to you, not as a reason, but a bona-fide excuse, for not posting a blog post, or much on flickr either (which is where I often post images if I don’t have much to say).

I haven’t been completely still though, I have a few blog posts that I can’t quite show yet showcasing some new clients – but they’re all waiting for launches of their own. So until their stuff goes live, I’m sitting on it.

If my kids noses stop draining, constantly, I might be able to muster up a few portraits for ya, but right now anything I’d show certainly wouldn’t be pretty, and with the aches in my own body, I certainly wouldn’t enjoy taking them. But plow through it right? It’s what we do after all. Parents. Photographers.

Home Remedy

Home Remedy

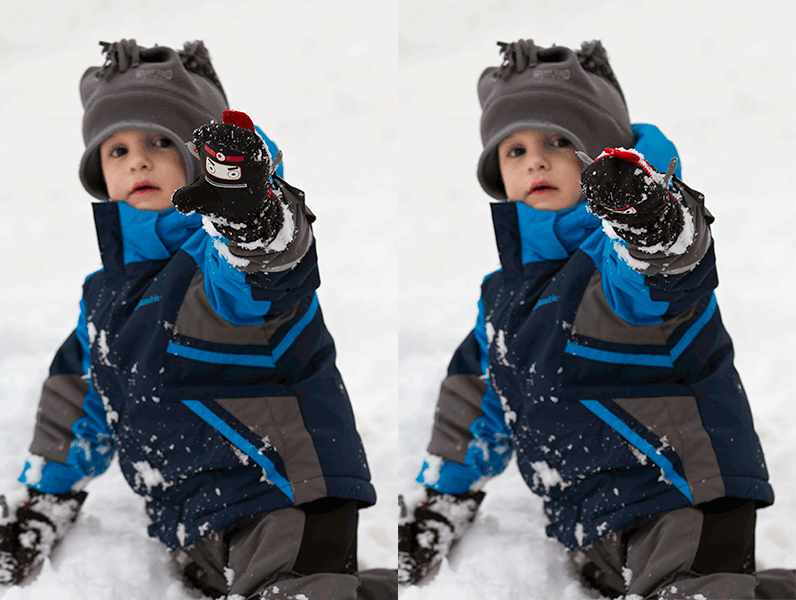
Home remedies for kids with colds – Quinn’s sick – though once I put him in front of the camera he sprung to life. Go figure.

Setup was pretty straighforward, I mention my setup info on my flickr page.

A friend of mine once asked “What are all these .XMP files, and why do I need them?” She was clearing out space on her hard-drive, and was confused about the hundreds (maybe thousands?) of .xmp files she had in her folders.

XMP

XMP is a “sidecar” file that is created to accompany the RAW files you’ve imported from your camera (You do shoot in RAW don’t you!?). This accompanying file is where all the processing information you’ve input into your favourite RAW converter, Aperture, Lightroom, and especially Bridge, is stored. Every time you open up Bridge, and work on an image +.3 exposure, +20 clarity etc. that info is written into the .xmp file, so that your settings will be remembered in the future.

Yes, Aperture and Lightroom have a catalogue that tracks these changes independently, and for those programs you don’t necessarily need the .xmp to keep track of your changes to those file – but you won’t be able to see those changes in any other program either since it doesn’t have access to that .CAT file.

Kinda complicated eh? And to make things worse, if you DID make those changes to the .xmp and, say, delete it because you were trying to free up space, or copied and pasted all the RAW files (but missed the .xmp’s) your settings are misplaced, or even lost. Broken connections in your workflow can be embarrassing, frustrating and devastating depending on the value of your edits.

DNG

Another option, one I use, is to convert your RAW files to .DNG (digital negative). DNG will embed all your edits into one file, including the RAW image data – think of it as a bundle – plus the DNG file-size is cumulatively smaller than the RAW+XMP combined. Now you don’t have to worry about transferring or storing twice the quantity of files, and if you need to send or share my RAW file you can do so with all the proper data embedded within it. That DNG is your new RAW file and it includes all of the .xmp data without the headache of maintaining a separate file!

Lightroom (which is what I use) gives you the option to convert to DNG upon import; this is a nice way to keep it automated and part of your workflow. I’ve recently stopped doing it this way, though, because it takes extra time to import and convert your files and on a big shoot (like a wedding) I’m spending FAR too much time converting images, many of which I’ll soon delete completely. Sadly Aperture does not allow you to convert to .DNG, but it does read the file type.

Workflow

My workflow goes like this: I import RAW riles through Lightroom’s Import dialgue using “copy”, add my meta-tags (© info), and then go through my images hitting ‘P’ for my selects and ‘X’ for my rejects. After this laborious process, I’ll make sure I haven’t rejected all of any given series of shots (of particular groups or moments) and hit ctrl+backspace (CMD+Delete on a mac I think) to delete all of my rejects. If I’ve done a good enough job, I probably have about half of the images I started with. These are the ones I’ll convert to .DNG and do all my RAW edits on.

To convert to DNG: select all, or single out, the images you want to convert, go to your Library Menu, and choose “Convert Photo(s) to DNG.

There are a few other advantages beyond the whole “two file” thing. DNG can be read across a number of applications, some that may not be able to read your camera’s particular RAW file. This happened to me a few years ago, after I purchased Panasonic’s LX3 point and shoot camera. While Adobe had support for these files pretty fast in Lightroom, I was unable to edit them in unsupported programs – I hear Apple has a particular delay in updating their camera RAW support. Theoretically, converting these fancy new RAW files to DNG will allow other programs to read and edit your digital files unencumbered, including Aperture.

Is DNG perfect? Likely not, I’m sure there are proprietary algorithms that every camera manufacturer encodes into their files. Something that might go missing, or not be done perfectly to spec. In practice, working weddings, events, portraits… I haven’t run into an issue yet.

There are a lot of very technical articles written on both sides: why to use DNG, why not to use it – I strongly recommend you read a few of them before coming to your own conclusion on what’s best for you. Some argue that it’s an open format that anyone can use; that it’s a closed format proprietary to Adobe… it’s probably somewhere in-between: the photographers version of a .PDF document. I’ve found it a hastle-free, economical use of my time, storage, and workflow.

Do you use DNG? Why? Or why not? Sound off in the comments!