- Hide menu

Blog

Real Estate

Real Estate

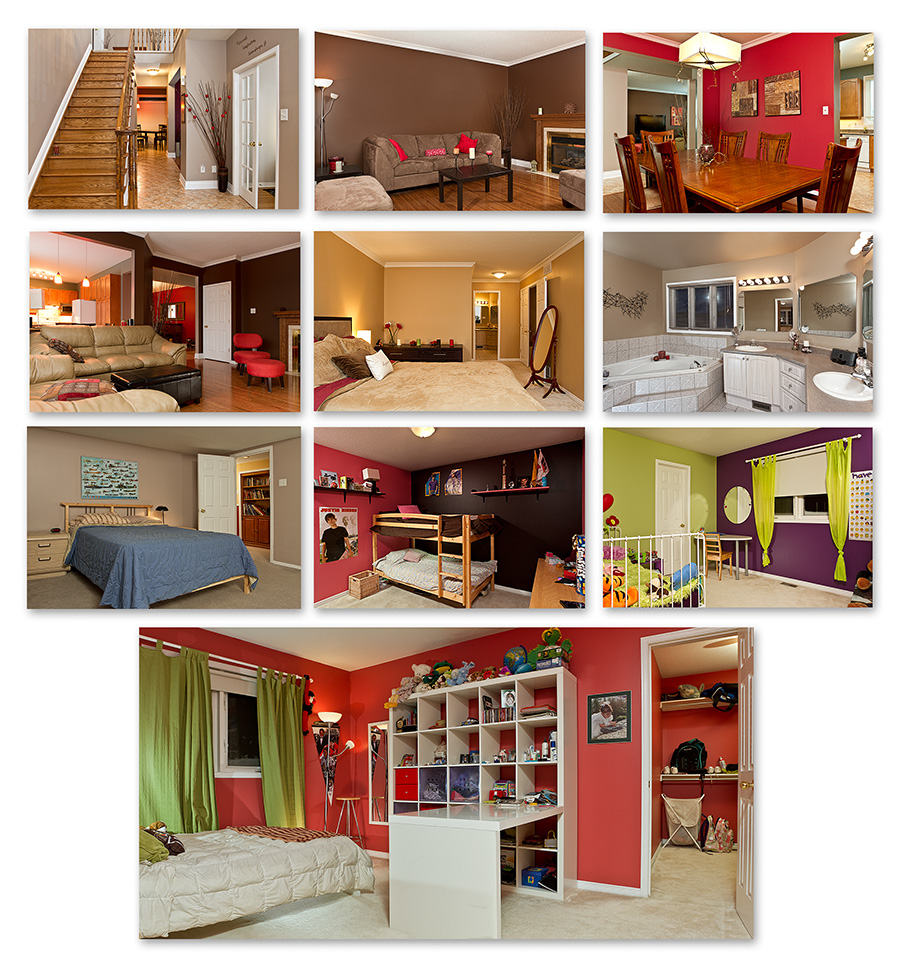
As chance would have it, I’ve been picking up some work lately taking real-estate photos. Pictured here is my sister-in-law’s house which she’ll be selling, on her own, through grapevine here).

This was the second shoot I did in the past month and I felt I improved over the first a lot. The learning curve for this stuff is steep, but if you have a good foundation in composition, and lighting, you’re most of the way there. I will say this – you need multiple small strobes to pull off any of this work. Even I felt strained with “only” 4 speedlights there. So strained, in fact, that I’ve recently purchased two more.

You can’t just walk into a house and start blasting away. You need to represent the room and feel of the location, as well as light it so that the photograph shows what your eyes see (since our eyes adjust to shadow where a camera will just see blackness). It takes time, patience, and fiddling around as stray reflections cast awkard shadows all over the place. Many you catch, some you don’t until you get home and *facepalm* have to correct it in Photoshop

I felt very confident walking into these jobs as I was reading Scott Hargis‘ excellent e-book “Lighting Interiors” which I would highly recommend anyone wanting to enter this field. In fact, if you’re trying to sell your own home, and don’t want to shell for a photographer (which, by browsing the internet, many of you don’t) at least buy this book to A: educate yourself on how to take flattering photos of your half-million dollar product, or B: To realize you should really just hire a photographer; it’s an investment.

Hopefully by getting me to take her real-estate photos, I can help Mel’s sister sell her house for what she wanted. The photographs of the rooms aren’t harsh like those that could be taken with a point-and-shoot’s on-camera flash, and I’ve taken time to straighten all the verticles in the images to keep up with a professional standard. You can see some of my images larger over on my Flickr page. Let me know what you think!

Ottawa Photographer – Lens Filters: No Protection

Ottawa Extreme Family - Justin Van Leeuwen

I like the adventure, the thrill, the danger that it brings. I leave myself exposed and open – that’s right – I don’t use a UV filter to protect my lens glass.

This is a controversial subject among “#phodo gear-heads, and I’ve read as many good reasons as bad as to the use of a UV filter. What I want to do here is explore WHY I chose to not strap one on, and how’s it’s affected my work (if at all).

Glass in front of glass in front of glass in front of…

Okay, so you just bought a lens, lenses are expensive right? Complex machines made of multiple optics, all finely tuned, coated, convex & concave to culminate in the precise instrument of your desire. from $100 to $5,000 (and more) there’s no shortage of options. They’re an investment too, and you want to protect your investment, so let’s drop that filter the salesman just sold you in front of all those precision optics.

Oh wait! You just turned your $3,000 70-200 f/2.8 L IS into a $60 UV filter of suspect origin; nice one! My mom always told me, “the strongest part of any system will be its weakest link”. Guess you just added that link didn’t you? The lens was designed to perform as optically perfect as possible with the glass already included in the design: if the engineers wanted or needed another piece of glass on there – they’d have already included it, right?

What’s the big deal?

Well, first, I know for a fact that it will (negatively) affect my camera’s AF ability, or it has. Maybe not all the time, with every camera, with every aperture. But in a simple test (filter on, focus/filter off, focus) my camera mis-focused, or spent more time seeking focus, when I had the filter on than off. That was MORE than enough reason for me. Missed shots? Out of focus shots? That’s not what my clients pay me for and that’s not what I came to photograph.

Flare

Every piece of glass you use & stack and expose to light will be prone to more flare. Yes, there are multi-coated filters that will reduce this, but that “first line of defence UV Filter” you just put on there will likely enhance, not only visible bursts of sun flare, but invisible bleed from the edges kind of light that can reduce the contrast of your image – again making them soft.

Stacking

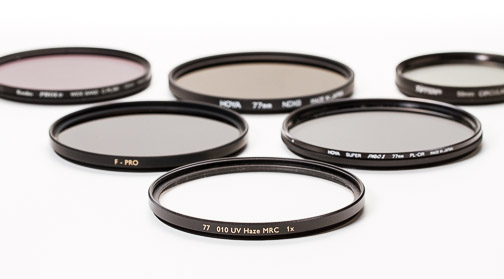
If you use multiple filters (I talk about them later) then stacking them will inevitably add vignetting to your lens. ESPECIALLY on wider lenses. At first it will be a bit of darkness at the edges, but you keep adding them and you’ll actually see the edge of the filter. In some conditions, your filters will get stuck to each other and then you’ve got a real pain in the ass on your hands trying to separate them, as your light fades, or your models head home. Stacked filters can lead to stacked filter cuts, Landscape photogs know what I’m talking about.
Filters

Up-sell

I used to work at Best Buy, we were ALWAYS trying to up-sell our customers on cables and service plans because the margin on electronics was woefully small in such a competitive market. The same holds true for cameras and filters so the retailers need to sell SOMETHING to you that will help them make a bit of extra cash. Filters are a simple add-on that have an easy sell; they’re like insurance “it will protect your lens.” Also, I kind of don’t give a shit that they’re “UV” filters, my camera sensor is UV protected already, so what exactly does that matter? It’s like putting SPF 15 over my waterproof SPF 40.

I wish the sales were more focused on goods that would truly improve your camera’s performance. Something as simple as a lens hood (yes, included in many L series lenses and all Sigma lenses) will reduce flare from entering the sides of your front element as well as protecting your lens. With a hood attached you’d have to specifically launch an arrow into my lens to touch the glass. If your lens doesn’t come with a hood, get one – and skip the filter.

Hidden costs

I’ve heard that the cheapest piece of glass to fix and replace, on any lens, is its front element. How much? I have no idea. despite never wearing UV protection I still have yet to make a scratch on my glass – even 2 monsters kids can’t seem to nick my bulbous fisheye… so I’ll just take the internet ether’s word for it.

The others

There are, however, filters that will have a desired effect on your lens, one that you can not recreate in Photoshop, or in-camera, without their assistance. These are Polarizers, Neutral Density Filters, or special effect filters. These filters help you cut non-metalic glare, letting you see through water, or saturating your colours; they let you create impossibly long exposures, turning people into blurs and flowing water into silky strands; they even help you change the tonality of your images, or create a “blended” image in a single exposure.

I own a few of these filters and use them often; the Polarizer being a favourite for sunny days and landscape work – it helps when doing real-estate work too by cutting the glare on reflective counter-tops and cabinets. I guess they *also* protect my lens but, again, I haven’t broken one, and take them off when I’m not specifically using them.

Do what you want

I’m not trying to stop you from using UV filters, lots of my friends are too scared/wussy/paranoid to dream of exposing their precious glass to the “real” light, and choose to “filter” it (see what I did there) through their best B+W or Hoya (if you insist, I do recommend you stick with GLASS by one of these two brands).
My advice? Do a quick test yourself. Take your favourite lens and do a quick focus test based on a stationary object and using your tripod. Put the filter on, try to focus, take the shot, repeat without filter. Then check your exposures on your monitor to see if there’s a difference. That’s all I did, and for me, that made the decision easy.

If anyone reading this has some real-life examples, or fancy science to show off why they work or don’t, leave a comment and enlighten us! Thanks.

Edit 1/2/2011 10:40pm: To prove that light will bounce between your optics check out the refraction on this image (little green dots) and a more extreme example here thanks Chris!
Adorkable Thespians

Adorkable Thespians

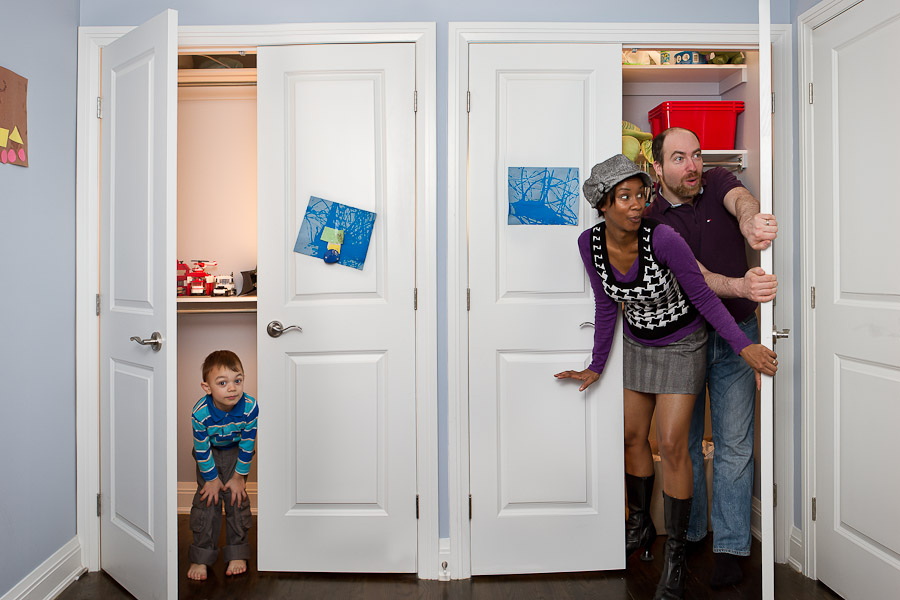
Other way guys… see? I told you I was taking photos of other families.

Maybe a bit less “extreme” than maybe some of my previous posts, this was a concept Nadine and I met and discussed. She was pretty clear about what she wanted – which makes it that much easier for me – it gets us straight to the logistics because you can spend HOURS on different concepts with no direction.

Nadine, her “man-of-mans”, and her son play hide-and-go-seek almost every night before bed. Inevitably he hides in one of his two closets: not too hard to find.

I’ve known Nadine since I moved to Ottawa, maybe not in person though, sort of one of those “friends of friends.” As she’s an avid blogger, actor, Tweeter, and sex columnist… amongst other things, you also may have “seen” her around.

If you’re interested in booking your own “extreme” family portrait session gimme a tweet, or read a bit more on my about page (to see if you really, really like me).

Special thanks to Younes Bounhar for getting me on location and setup SUPER fast, I literally could not have done this without him (or someone else of equal measure).

Never Alone

Extreme Family portrait by Justin Van Leeuwen

My inspiration of this series is Jason Lee, or “jwlphotography” on Flickr. I first heard of him when the Strobist blog featured his work – doing amazing setups with his two little girls – I’ve been hooked ever since. His own work has taken a bit of a departure from the surreal and comical – no less excellent, mind you – I’m sure he won’t mind if I pick up where he left off.

Due dilligence done.

So this idea, basically came about the same as any other: a friend and client mentioned to me, how Mel’s first week back at work would include some “adjusting to going to the bathroom alone”. How true that is – these kids pop up everywhere – if you want them around or not. But that’s our role as parents right? We don’t get to turn “off” our children at will unless we have enough NyQuil (I joke).

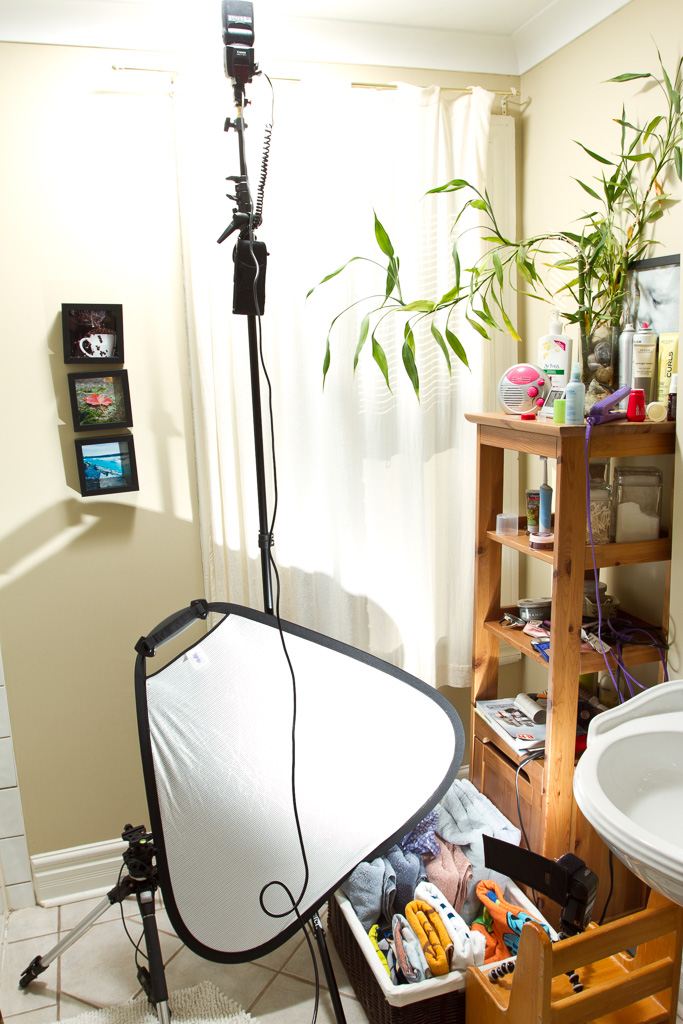
Here’s a setup shot for those interested in the lights I used:

0633-20110116-WEB

You’ll see I’ve toned down that back light a bit – I know it’s “necessary” to give things a good 3D feel, but had a habit of blowing it out of proportion early on. A great thing about the 7D is I can tune the flashes, remotely, from the camera, to exactly the ratio/output that I want. It’s fired through a Lumiquest LTp, which I mentioned with it’s younger brother the SBIII in this post about softboxes.

The Softbox gives the light a little spread, so it will pass by me and hit the kids, wherever they decided to end up. After that, I’m just concerned with lighting the room. With my sons moving around, I don’t have a lot of choice if I wanted to create isolated, dramatic light, so I go for big bounce fill by sticking the 580exII right up into the ceiling (which is white) and that’ll fall down and cover most of the small area.

To make sure we have lighting at eye-level, I bounced a 430ex into a reflector, which is toned down to not dominate or be the obvious light source (lights come from “up” right?) but enough so that we’re not cast in shadow. You’ll see a little flag on the 430; that’s to keep the light from hitting my lens and creating flare. It’s a Honl Photo Gobo. You should just load up a cart with pretty much all his stuff now, because you never know when you’re gonna need a handy flash modifier.

Of course I’ve posted this image to Flickr, which you can see larger there. As always, I’d love to hear what you think – about the series, about this image, technically or whatever – so comments are welcome.

Delicious Baby Brother

Ottawa Extreme Family Photographer Justin Van Leeuwen

Since starting my SAHD series I’ve received loads of positive feedback, in the form of direct image views on Flickr, and being approached by clients and families to photograph their own “Extreme” family portrait. I’m grateful for all the attention, it certainly helps boost my ego on these dark winter days.

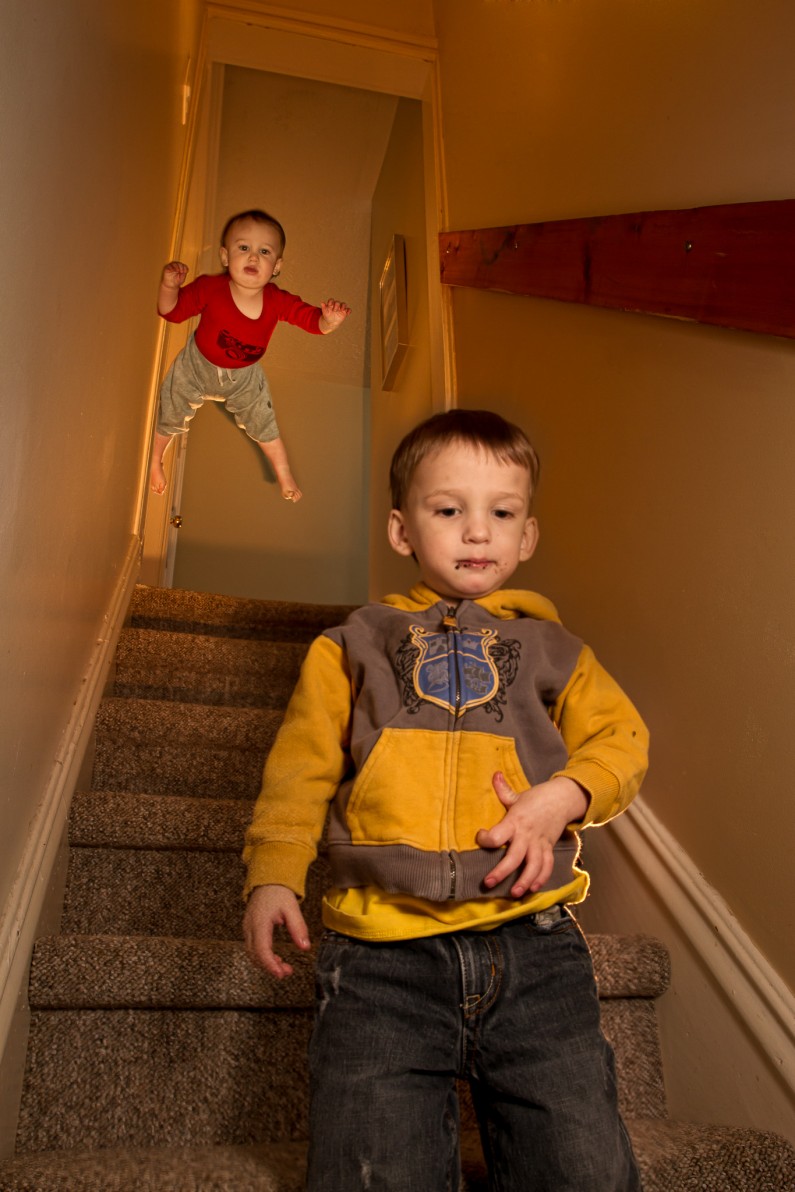
I took a break from producing an overly complex image for this one. The more images I have to stitch together, side by side, the more margin for error there is in the final product. I’ve mentioned this before, but I’m doing these WHILE taking care of my kids, so processing is an interesting endeavor whilst holding a one-year-old (of course I don’t work this way on my clients images).

So this photograph is a simple single image composite, layered and blended. Yes, even the element was a unique exposure, sans baby, I had to drop the shutter speed to 1/10th of a second and turned off the strobes to get the flame to register on the camera.

I lit this simply, maybe harshly, by using only Canon strobes, leaving my bigger Elinchrom Quadra out. Sometimes it’s just faster to work with small lights. If you have enough, they’ll do the job asked of them.

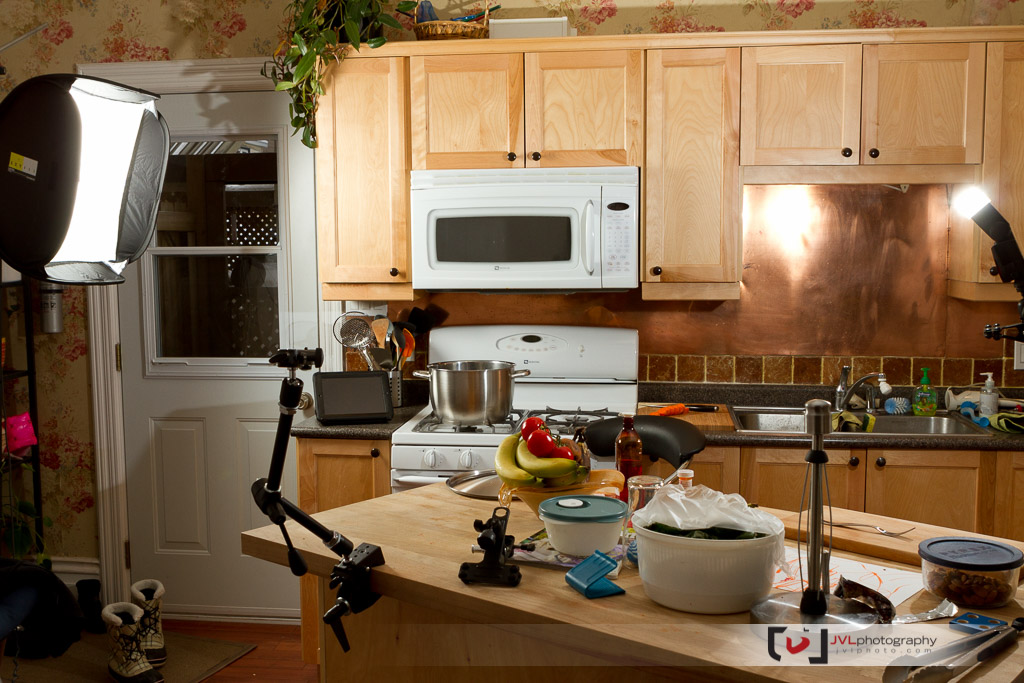
I’d like to mention, new to me, Canon’s flash control menu on the 7D (is it in any other bodies?) is amazing, and gave me full manual control over a single master flash (camera left) and two slaves; a 430ex CTO gel’d behind the pot to simulate the overhead light(not triggered in the photo below), and a 580exII with a sto fen diffuser at camera right to fill in the shadows and even out the scene. With the flash control menu I was able to dial in the numbers all from the safety of behind my camera, allowing me to work quickly and accurately. Of course Nikon shooters have had a similar option for many, many years – small victories I guess.

Ottawa Extreme Family Photographer Justin Van Leeuwen

As you can see, I used a Manfrotto magic Arm to hold the camera in place. My tripod wouldn’t fit in the area I wanted to compose the frame, but this thing clamped to the island perfectly. I don’t use it all the time, but it is super handy when needed. there’s two kinds available, I have the kit version, but I hear if you buy it on it’s own there’s an easier to use tension wheel instead of the lever like I have.

You can also see this image bigger from my Flickr page by clicking on the magnifying glass.